Abraham Brody's Macmaps currently utilizes remote access tools by AnyDesk to offer remote assistance
on both Macs and PC (PC directions from third party).
Downloading and setup is discussed below for the Mac.
Mac Configuration-
1. Download the following link for Mac OS El Capitan through Ventura (Mac OS 10.11 through 13.0)
https://anydesk.com/en/downloads/thank-you?dv=mac_dmg
Similar directions exist for Yosemite (Mac OS 10.10 on this link):
https://download.anydesk.com/macos/10.10_Yosemite/anydesk_v6.0.2.dmg
2. A dialog should appear to open with the image mounter:
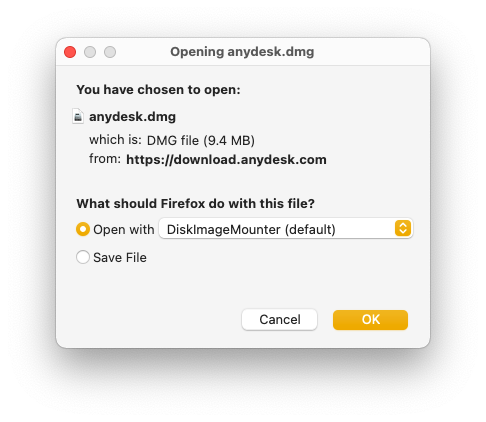
3. Click OK. If all is well, it will open with:
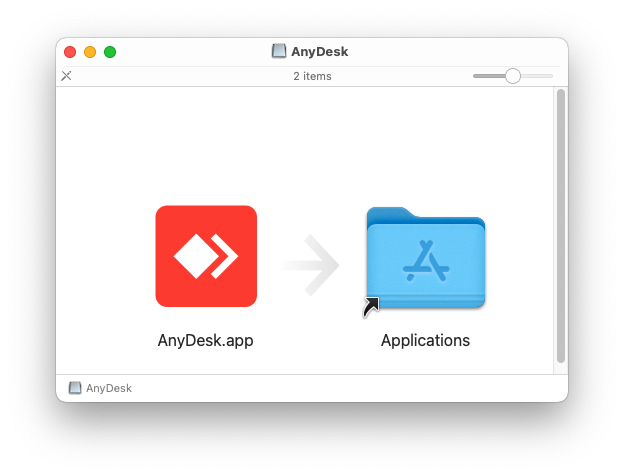
4. At which point you simply click and drag the AnyDesk icon over the Applications icon.
Then Open the Applications folder by double clicking it in the icon above, and it will reveal the window below:
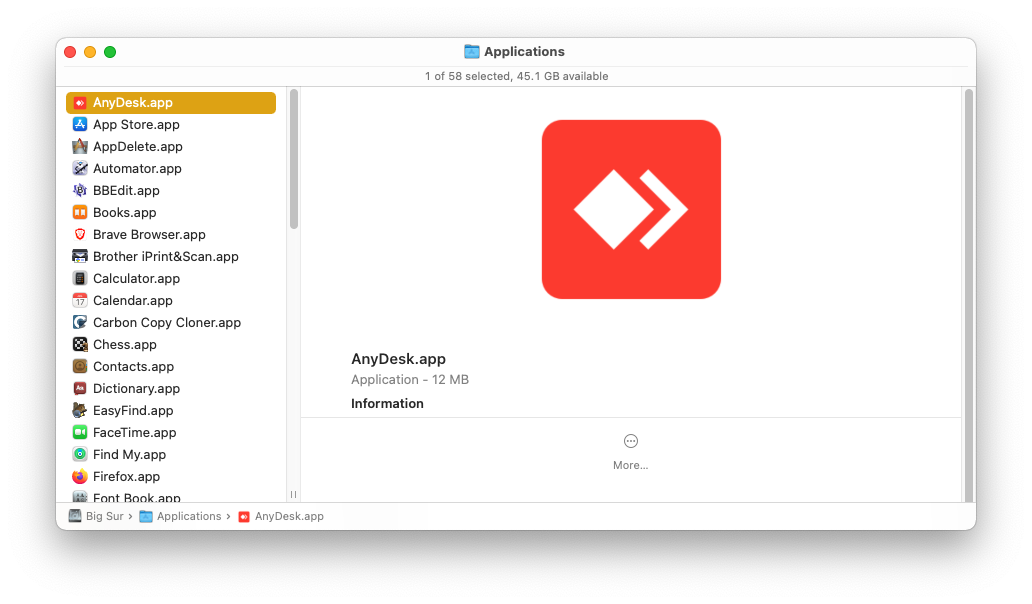
5. From there, simply double click Anydesk on the window that looks like above.
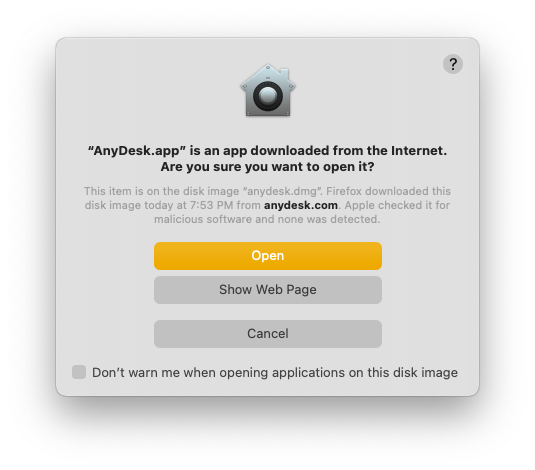
6. Click Open if asked on the above window.
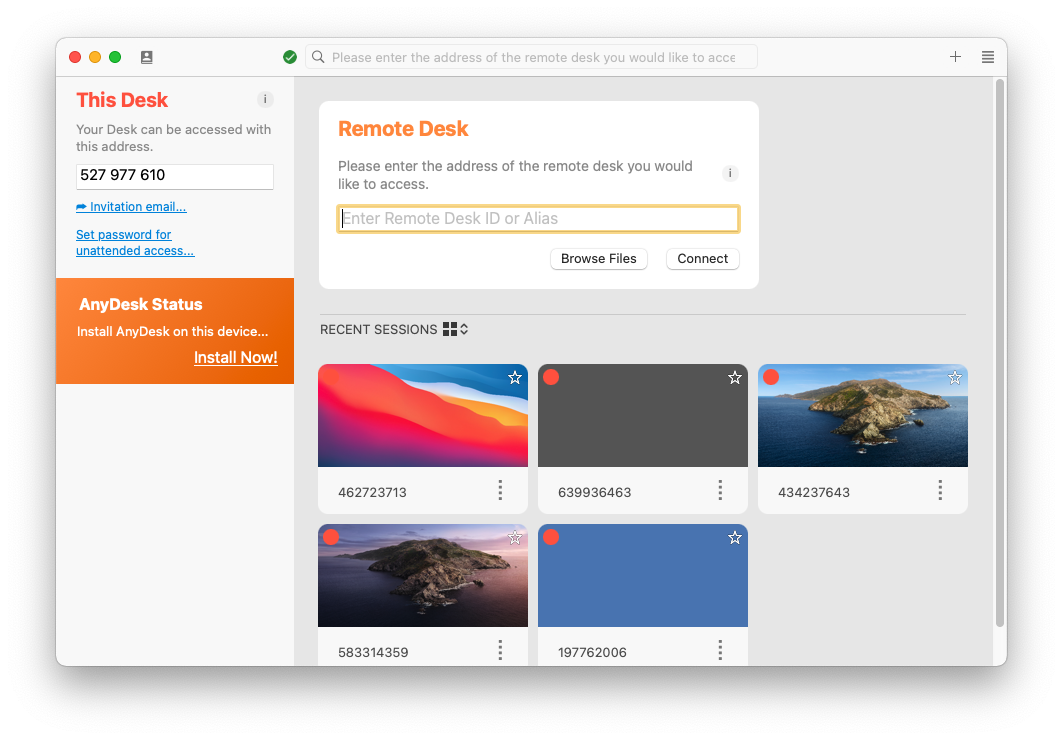
7. This will bring up the main window for Anydesk. If it says Install now, or configure
click on the install now or configure on the left side of the image below:
8. That will bring up the Security System Preferences skip to step 11 if it goes to Security and Privacy, step 10,
if only at System Preferences. If it doesn't, go to Apple menu
9. and pick system preferences, from the second item in the menu (In Ventura and later Mac OS, the second item is called System Settings):

10 In System Preferences Pick Security and Privacy,
Ventura and Pre-Ventura differences
| Pre-Ventura |
Ventura Mac OS 13.0 and later |
|
Pick Security and Privacy icon on your Settings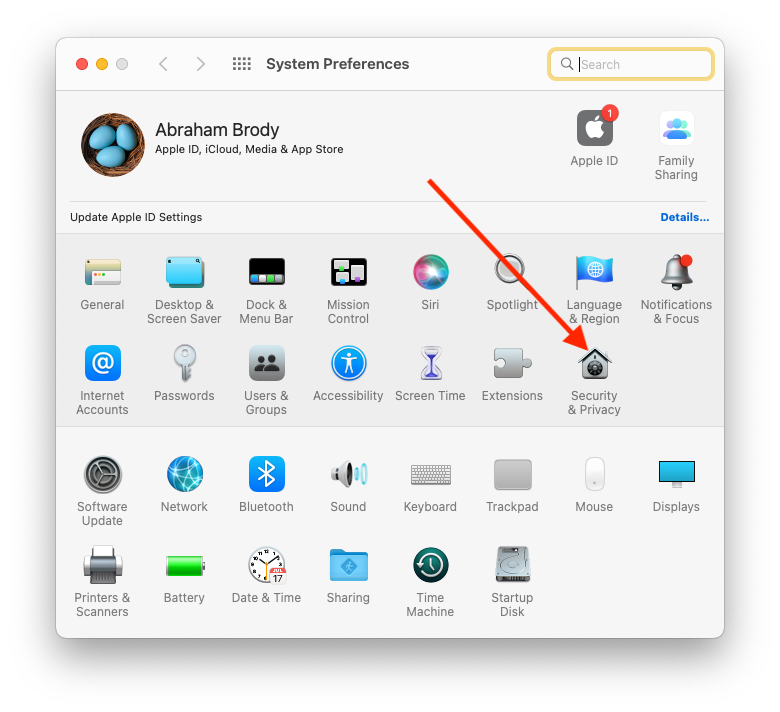
|
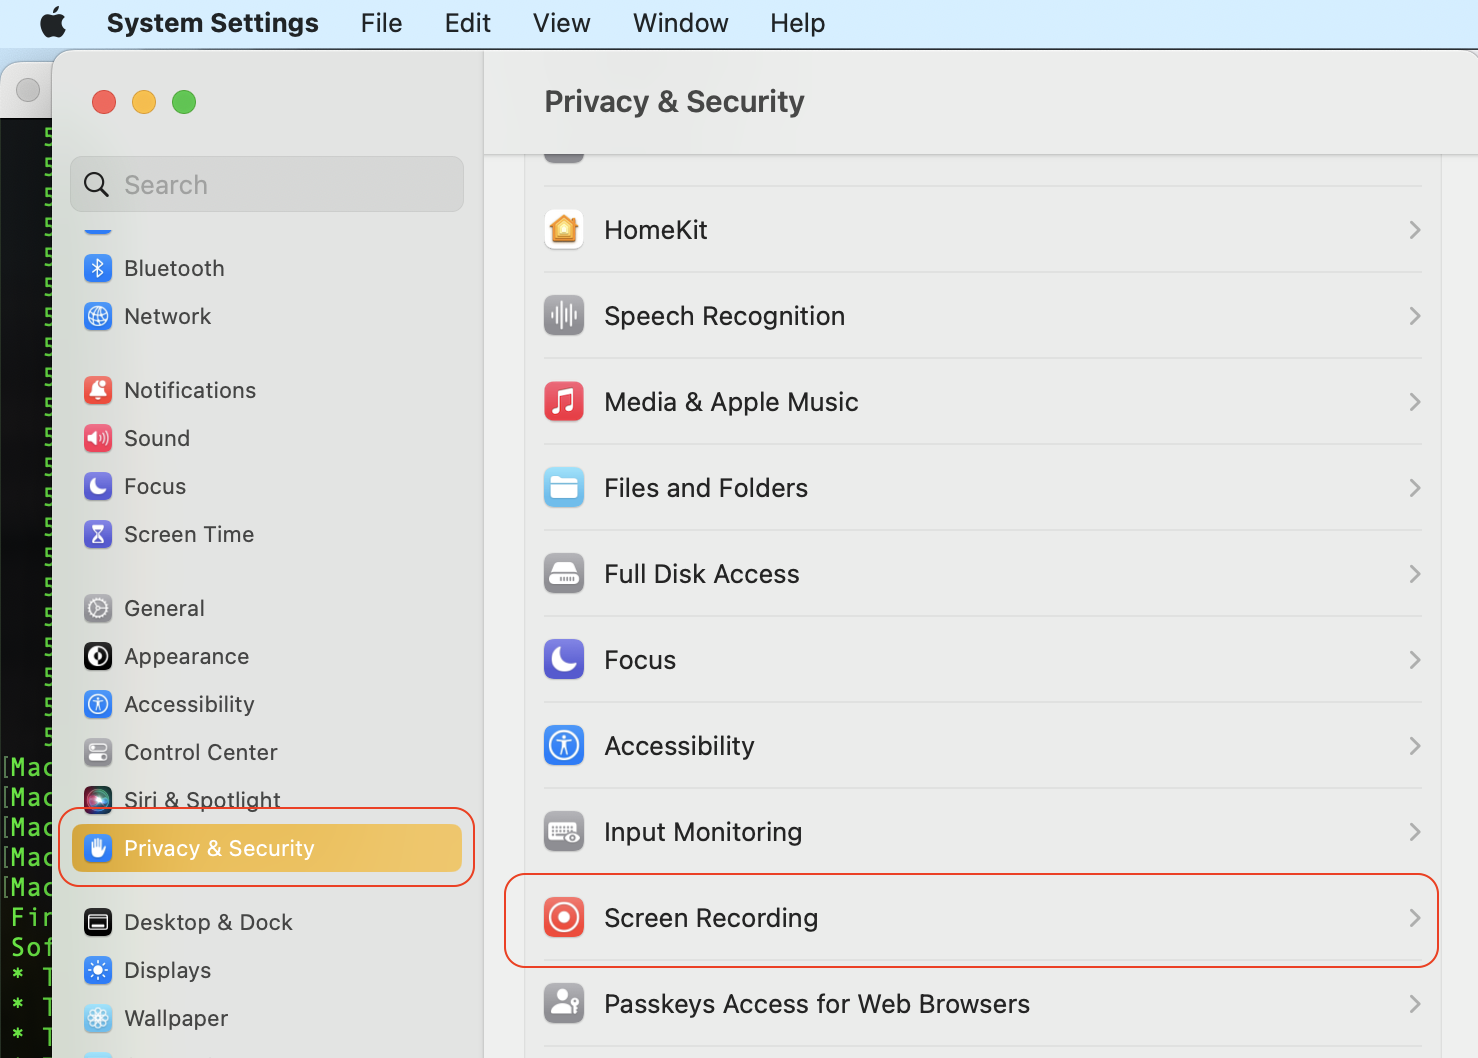
Under System Settings, Pick Privacy and Security and note each item on the right pane has a >
next to it, where you can adjust the settings for that item
|
|
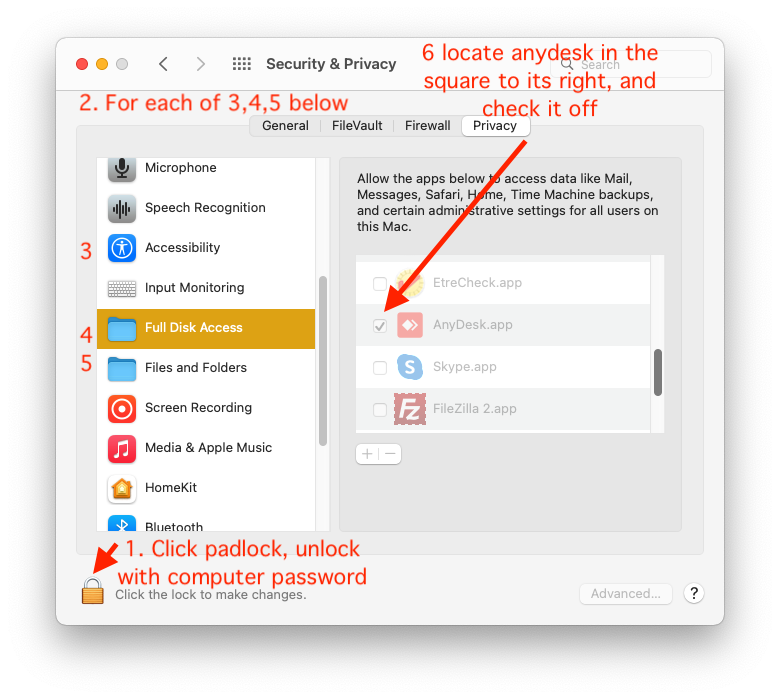
In Security and Privacy, pick Privacy at the top. This will reveal two scroll lists.
Before you go through them, pick the pad lock on the bottom left corner, and unlock with the password used to login your computer.
Then scroll down the left group, and pick Accessibility, Full Disk Access, Files and Folders, Screen Recording (not enumerated, but immediately below Files and Folders) and check off AnyDesk in the right list on each one. If AnyDesk is not. present use the Plus sign below the right list to add it. If the left panel is missing any of those settings, it is an earlier OS than Monterey and not required for setup. You may need to scroll the left panel to ensure it isn't missing:
|
Like Pre-Ventura, you will need to pick each of the items, Accessibility, Full Disk Access, Files and Folders, and Screen Recording on the right side of Security & Privacy. As you enter each pane, add AnyDesk if it is not available, and make sure it is turned on sliding the slider to the right of Anydesk to the right so it shows green. Just like pre-Ventura a plus sign on the bottom of the right pane lets you add applications to the list. Below is the example Screen Recording. Use the < on top of the right side of settings to switch to the next item in Privacy and Security:

|
12. When you click on Quit in the System Preferences or System Settings menu to the right of the Apple logo, 
it will ask if you want to Quit and reopen Anydesk, and you will want to.
13. Once it reopens, share the "This Desk" number in` the upper left corner of AnyDesk window. This is a 9 digit number separated by spaces
which you can share with me
14. Once the tech connects a black window similar to this, will open with the word confirm on the bottom.

Confirm in green to allow the tech on.
The rest is between you and the tech.